How to add DataLayer tracking code to track successful form submissions in Gravity Forms.
To ensure that form submission events from Gravity Forms are tracked, you’ll need to add a custom HTML code snippet to the confirmation settings of the form. This custom script will push relevant data into the DataLayer, which can then be captured by your GTM setup.
Here’s how to set up the tracking:
1. Open Gravity Forms Dashboard:
Navigate to your WordPress dashboard and select the Gravity Forms plugin to open the list of available forms.
2. Locate the Form:
Click on ‘Forms’ in the main dashboard.
Select the form you wish to track by clicking on its title.
Once in the form editor, click on ‘Settings’ and then select ‘Confirmations’.
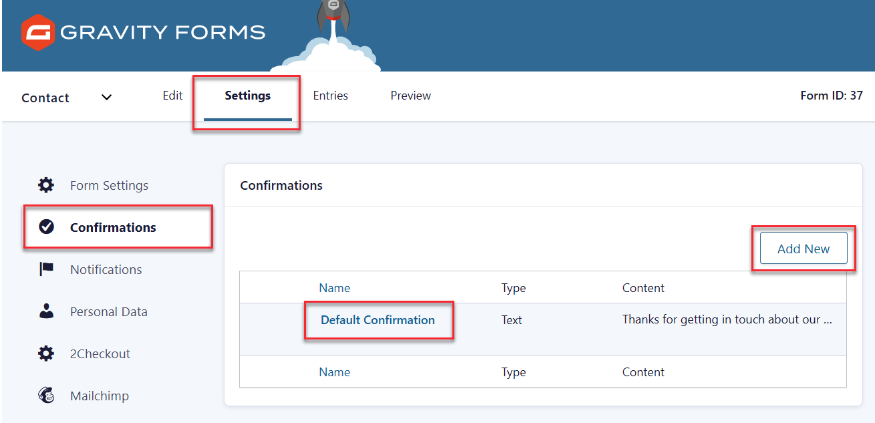
3. Edit the Confirmation Text:
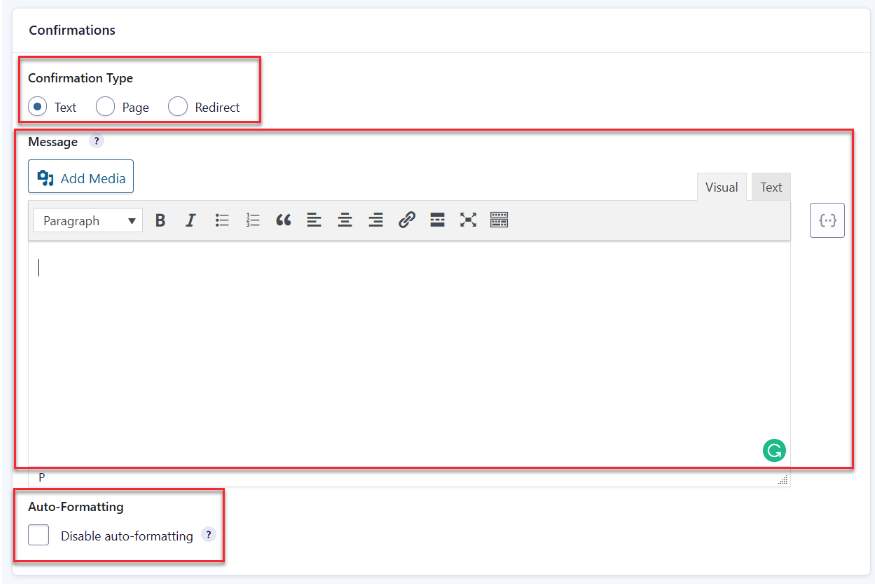
In the Confirmation settings, you’ll typically see the confirmation type set to “Text”.
Switch the text editor to “Text” mode (instead of “Visual”) to enter the code without any formatting issues.
4. Add DataLayer Push Code:
In the Text editor, enter the following JavaScript code:
<script>
window.dataLayer = window.dataLayer || [];
window.dataLayer.push({
‘event’: ‘formSubmission’
});
</script>
- This code snippet pushes an event named formSubmission to the DataLayer whenever the form is submitted.
- Disable Auto-Formatting:
- Before saving, check the box labeled “Disable the auto-formatting” at the bottom of the editor. This prevents Squarespace’s editor from altering the JavaScript code, which could break the functionality.
- Save and Exit:
After adding the code and disabling auto-formatting, save your changes and exit the form editor.
Related Articles
How to add a simple product to your WooCommerce shop.
Here are the steps to adding a simple product to you WooCommerce shop. Step 1 - Navigate to the Add Product page in the backend of your WordPress website. Step 2 - Add a product name and description. Step 3 - Add Product Images It is Important to ...How to add Solds through the Property plugin
Here are the steps to add a new sold property to be shown on the Solds page. Step 1 - Login to the backend of your website through the login page The link to the login page is: example.co.nz/gd_dashboard Essentially you just have to add the extension ...Building / Editing the Site Navigation Menu
Creating a Navigation Menu and Adding Items From the WordPress dashboard, go to Appearance > Menus If you are creating a new navigation menu from scratch, then enter the name of the navigation menu and click Create Menu To add pages to the navigation ...How to make simple changes to your WordPress website with Divi Page Builder.
Here's how to make simple changes to your WordPress website using the Divi Page Builder Step 1 - Navigate to the Pages page on your WordPress website Step 2 - Select the page you would like to edit Hover over the page you would like to edit and click ...Logging into the back end of a Wordpress Website
Steps to logging into the back end of a Wordpress Website 1. Open Your Web Browser: Launch your preferred web browser (e.g., Chrome, Firefox, Safari). 2. Enter Website URL: In the address bar, type the URL of the website. Press Enter to navigate to ...